Quotes

In the world of photography, backdrops play a crucial role in creating captivating images. They set the stage, enhance the mood, and provide a visually appealing background for the subject. While professional backdrops are readily available, crafting your own DIY backdrops offers numerous benefits. Not only does it allow you to unleash your creativity, but it also provides a cost-effective solution that transforms ordinary objects into extraordinary photographic props. In this article, we will explore the art of crafting DIY backdrops and discover how everyday items can be repurposed to create stunning backgrounds for your photographs.

Choosing the Right Materials

The first step in crafting a DIY backdrop is selecting the right materials. Several factors come into play when making this decision. Consider the durability and flexibility of the material, as it should withstand repeated use and manipulation. Texture and color are also important, as they contribute to the overall aesthetic appeal of the backdrop. Additionally, reflectivity and opacity should be considered based on the lighting conditions and desired effect. Fabrics, textiles, wrapping paper, wallpapers, wood panels, and artificial flowers and foliage are examples of materials that can be suitable for creating DIY backdrops.

Preparing the Backdrop

Once you’ve chosen your material, it’s time to prepare the backdrop. Measure and cut the material according to your desired dimensions. Ensure proper attachment and stability by using clamps, stands, or other suitable methods. If you prefer a freestanding backdrop, explore options for creating a sturdy frame. Enhance the backdrop’s appearance by adding texture or patterns to the material. Consider techniques such as painting, dyeing, or incorporating props and accessories to elevate the visual appeal of your backdrop.

Transforming Everyday Objects

One of the fascinating aspects of DIY backdrops is the ability to repurpose everyday objects into unique photographic props. Look around your house for items that can be transformed into interesting backdrops. Bedsheets, blankets, curtains, drapes, rugs, and furniture coverings can all be utilized to create striking backgrounds. Think outside the box and explore the potential of materials such as cardboard or foam boards, vinyl records or CDs, and even bubble wrap or aluminum foil. Nature can also provide inspiration, with elements like leaves, branches, seashells, sand, and even fruits and vegetables adding a touch of creativity to your backdrops.

Techniques for Customizing Backdrops

Customization is the key to making your DIY backdrops truly unique. Experiment with different techniques to add texture, depth, patterns, and designs. Here are the top 5 best techniques for backdrop customization.

1. Adding Texture and Depth

Enhancing the texture and depth of your DIY backdrops can add visual interest and dimension to your photographs. Consider using stencils or stamps to create intricate patterns or designs on your backdrop. Alternatively, experiment with texture mediums or gels to add a tactile element. These techniques can transform a plain backdrop into a visually stunning masterpiece.

2. Incorporating Patterns and Designs

Patterns and designs can instantly elevate the visual appeal of your DIY backdrop. Get creative by painting or drawing patterns directly onto the backdrop using various colors and shapes. Another option is to use adhesive decals or stickers to create intricate designs effortlessly. For a more artistic approach, try employing photo transfers or collage techniques to incorporate images or textures onto your backdrop.

3. Playing with Lighting Effects

Lighting plays a crucial role in photography, and utilizing it creatively can enhance the impact of your backdrop. Experiment with different lighting techniques to create stunning effects. Correct lighting can not be under stated!

On a recent job in southern Florida, we took some photos of a nearly completed new dock for a Miami dock building company. The photos were purposely taken at sunset, in what we call, “the golden hour”. The pictures were magnificent and will proudly be featured on the company website.

Backlighting your backdrop can create a beautiful glow or silhouette effect. Incorporating string lights or fairy lights can add a whimsical touch to your backdrop. You can also play with shadows and silhouettes to create dramatic and intriguing compositions.

4. Introducing Unique Materials

Expand your creative repertoire by incorporating unique materials into your DIY backdrops. Consider using unconventional items such as feathers, lace, sequins, or ribbons to add a touch of glamour and elegance. Experiment with mixed media by combining various materials to create a visually captivating backdrop. Don’t be afraid to think outside the box and explore different textures and materials to make your backdrop truly stand out.

5. Embracing Color and Contrast

Color and contrast are powerful tools for customization. Experiment with bold and vibrant colors that complement your subject and theme. Create a striking contrast by pairing complementary or contrasting colors. Consider using color gradients or ombre effects to add depth and visual interest to your backdrop. Remember that color has the ability to evoke emotions and set the mood of your photographs, so choose wisely and let your backdrop become an integral part of your artistic vision.

Customizing your DIY backdrops allows you to infuse your personal style and creativity into your photography. These top five techniques provide a starting point to unlock endless possibilities. Whether you’re adding texture and depth, incorporating patterns and designs, playing with lighting effects, introducing unique materials, or embracing color and contrast, let your imagination run wild and create backdrops that are as unique and captivating as your photographs.

Tips for Photography with DIY Backdrops

Now that you have your DIY backdrop ready, here are a few tips to help you make the most of your photography session. Pay attention to the positioning and framing of your subject in relation to the backdrop. Consider the lighting conditions and make adjustments accordingly to achieve the desired effect. Keep in mind the subject and theme of your photoshoot to ensure that the backdrop complements the overall concept. Experiment with different angles and perspectives to capture unique shots. Finally, explore editing and post-processing techniques to refine your images and bring out the full potential of your DIY backdrops.

Conclusion

Crafting DIY backdrops offers a world of creativity and possibilities for photographers. By repurposing everyday objects and materials, you can transform them into stunning photographic props. From choosing the right materials to customizing your backdrops and mastering photography techniques, the art of crafting DIY backdrops allows you to unleash your imagination and create captivating images. So, go ahead and explore this exciting world of creativity, and don’t forget to share your unique creations with others. Let your DIY backdrops become a reflection of your artistic vision and add a touch of magic to your photography.
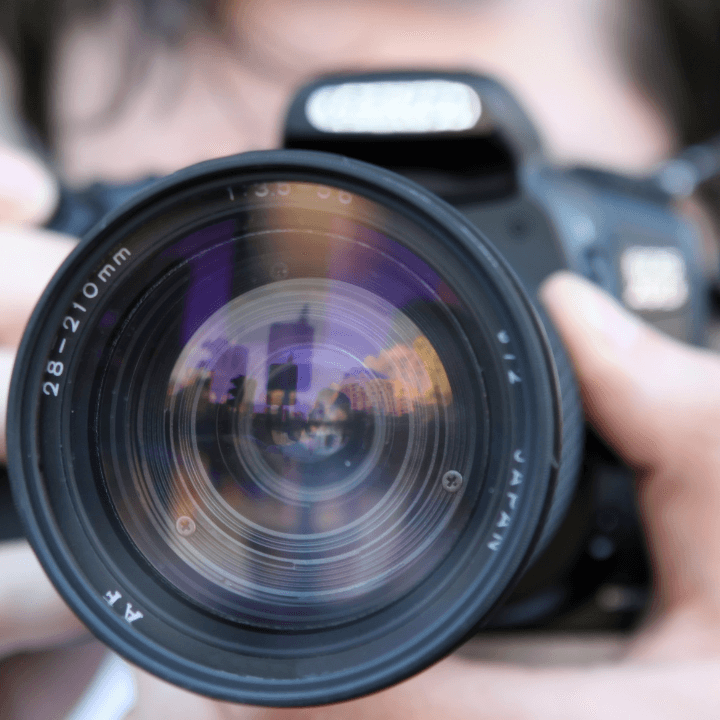
Lens filters play a crucial role in photography, allowing photographers to enhance their images and achieve various creative effects. While commercial lens filters are readily available, DIY lens filters offer an exciting opportunity for photographers to experiment and create unique effects without breaking the bank. In this article, we will explore the world of DIY lens filters, their benefits, materials and tools required, different techniques and effects, tips for usage, advanced techniques, precautions, and limitations.

Understanding Lens Filters

Lens filters come in various types, each with its own specific effect on the image. Common examples include UV filters for lens protection and reducing haze, polarizing filters for enhancing color saturation and reducing glare, neutral density filters for controlling exposure and creating long exposures, and color filters for adding creative color effects. Experimenting with different filters opens up a world of creative possibilities in photography.

Benefits of DIY Lens Filters

DIY Lens Filters offer a range of benefits for photographers looking to explore their creativity and enhance their photography skills. Here are the top five benefits of using DIY lens filters:

1. Cost-Effectiveness: One of the most significant advantages of DIY lens filters is their cost-effectiveness. Commercial lens filters can be quite expensive, especially if you want to experiment with different types and effects. DIY filters, on the other hand, can be created using readily available household materials at a fraction of the cost. This allows photographers on a budget to access a wide range of creative possibilities without breaking the bank.

2. Customization and Creativity: DIY lens filters offer the freedom to customize and tailor the effects according to your preferences and creative vision. With commercial filters, you are limited to the pre-determined effects and options available in the market. DIY filters allow you to experiment with different materials, colors, textures, and combinations, enabling you to create unique and personalized looks that truly reflect your artistic style.

3. Learning and Skill Development: Engaging in DIY projects for lens filters encourages learning and skill development. By constructing your own filters, you gain a deeper understanding of how filters work and their impact on the final image. This hands-on experience helps you become more knowledgeable about the technical aspects of photography and enhances your ability to manipulate light and achieve desired effects. Additionally, the process of experimenting and refining DIY filters hones your problem-solving skills and nurtures your creativity.

4. Flexibility and Adaptability: DIY lens filters offer a high degree of flexibility and adaptability. Unlike commercial filters, which come in fixed sizes and shapes, DIY filters can be easily customized to fit different lenses or camera setups. They can be cut, resized, or modified to suit specific shooting scenarios, allowing you to be more versatile in your photography. This adaptability extends to the effects as well, as DIY filters can be easily adjusted or combined to create new and unique looks for various subjects or environments.

5. Accessible for Beginners: DIY lens filters are an excellent starting point for beginners in photography. They provide an accessible entry into the world of filters without requiring a significant financial investment. DIY filters allow beginners to experiment with different effects and techniques, helping them understand the impact of filters on their images. This hands-on learning experience not only builds confidence but also serves as a foundation for future exploration and investment in professional filters.

In conclusion, DIY lens filters offer photographers several benefits, including cost-effectiveness, customization, skill development, flexibility, and accessibility. By embracing the world of DIY filters, photographers can unlock their creative potential, expand their technical knowledge, and produce captivating images with unique visual effects.

Materials and Tools for DIY Lens Filters

To construct DIY lens filters, you can make use of readily available materials. Transparent plastic sheets, colored cellophane, tissue paper, and aluminum foil are some examples of household items that can serve as filter materials. Additionally, you will need tools such as scissors, a craft knife, tape, and rubber bands to assemble the filters.

DIY Lens Filter Techniques and Effects

This section will provide step-by-step instructions for creating different DIY filters and showcase the effects they produce. Starting with a UV filter for lens protection, we will explore techniques for enhancing colors and reducing glare with polarizing filters, controlling exposure and creating long exposures with neutral density filters, and adding creative color effects using color filters. Alongside the instructions, sample photographs will illustrate the unique effects that can be achieved with each filter.

Tips for Using DIY Lens Filters

Using DIY lens filters effectively requires attention to detail. Proper attachment and positioning of the filters on the lens is crucial to ensure desired effects. Additionally, experimenting with different combinations of filters can lead to intriguing and unexpected outcomes. Finally, understanding how to handle and clean the DIY filters properly will help maintain their quality and longevity.

Exploring Advanced DIY Filter Techniques

For those seeking more advanced and creative effects, this section delves into additional DIY techniques. Multiple layers or combining different materials can yield unique and captivating effects. Creating bokeh shapes and patterns adds an artistic touch to photographs, while texture overlays and diffusion effects introduce an element of softness and visual interest.

Precautions and Limitations

While DIY lens filters offer exciting possibilities, it’s important to be aware of potential risks and take necessary precautions. This section highlights potential risks and provides guidance on how to avoid them. It also discusses the limitations of DIY filters compared to their commercial counterparts, acknowledging that professional filters often offer superior quality and precision.

Conclusion

DIY lens filters provide photographers with a budget-friendly avenue to explore their creativity and experiment with unique effects. By understanding the various types of filters, utilizing common household materials, and following simple construction techniques, you can create your own personalized filters. Embrace experimentation and allow your photography to flourish with the endless possibilities that DIY lens filters offer. Remember, the true essence of photography lies in the art of exploring and pushing boundaries.

Having a dedicated photography studio is essential for photographers looking to take their craft to the next level. It provides a controlled environment where you can experiment with lighting, backdrops, and props to create stunning images. While building a photography studio may seem daunting, it’s possible to do it on a budget. In this article, we’ll explore some practical DIY tips and tricks to help you build your own photography studio without breaking the bank.

Planning Your Photography Studio

Before you dive into building your studio, it’s crucial to plan ahead. Assess the available space you have and determine your requirements. Consider the type of photography you specialize in and the equipment you’ll need. Sketch out a layout and design that maximizes the functionality of the space while keeping your budget in mind.

Essential Equipment and Tools

Investing in quality equipment is important, but it doesn’t mean you have to spend a fortune. Look for budget-friendly options for cameras, lenses, lighting equipment, and accessories. Consider purchasing used equipment or renting gear when starting out. Research online marketplaces and photography forums for great deals. Remember, it’s the photographer’s skill that matters most, not the price tag on the equipment.

The Top 5 Essential Equipment and Tools for Your Photography Studio

1. Camera and Lenses: The foundation of any photography studio is a high-quality camera and a selection of lenses. Invest in a camera body that suits your style and budget, and complement it with versatile lenses such as a standard zoom lens, a portrait lens, and a wide-angle lens. This combination will allow you to capture a wide range of subjects and achieve different creative effects.

2. Lighting Equipment: Proper lighting is crucial for creating stunning images in a studio setting. Invest in a set of reliable lighting equipment, such as studio strobes or continuous lights, light stands, and modifiers like softboxes or umbrellas. This setup will provide you with control over the intensity, direction, and quality of light, enabling you to achieve professional-looking results.

3. Tripod: A sturdy tripod is an essential tool for achieving sharp and steady shots, especially in low-light conditions or when using longer exposure times. Look for a tripod that is stable, adjustable, and compatible with your camera and lenses. This will ensure stability and allow you to experiment with different compositions and techniques.

4. Backdrops and Props: Create a versatile and captivating studio environment by investing in a selection of backdrops and props. Choose backdrops in various colors, textures, and patterns to suit different themes and moods. Additionally, include props like chairs, tables, and accessories to add interest and enhance your compositions. This will allow you to create unique and visually engaging images.

5. Light Meter: A light meter is a handy tool for measuring and controlling light in your studio. It helps you achieve accurate and consistent exposure readings, particularly when working with artificial lighting setups. By using a light meter, you can ensure that your images are properly exposed and maintain consistency across your shoots.

Remember, while having these essential tools is important, it’s your creativity, skills, and knowledge that truly bring your photography studio to life. Practice using these tools effectively, experiment with different techniques, and continuously refine your craft to capture breathtaking images.

Creating a Functional Studio Space

Choosing the right room or area for your studio is vital. Look for a space with ample natural light and enough room to accommodate your equipment and clients comfortably. Optimize natural light sources by positioning your studio in a well-lit area. If natural light is limited, explore artificial lighting options such as continuous or strobe lights. Additionally, consider storage solutions and organizational hacks to keep your studio tidy and efficient.

DIY Backdrops and Props

Backdrops and props add versatility and creativity to your studio. Building a backdrop stand using PVC pipes is a cost-effective option. Get creative with materials like fabric, paper, or even repurposed items to create unique and budget-friendly backdrops. Similarly, craft props using inexpensive materials such as foam boards, cardboard, or fabric scraps. DIY backdrops and props allow you to customize your studio and make it truly yours.

Lighting Techniques for Different Styles

Lighting is a crucial aspect of photography. Experiment with different lighting setups based on the style of photography you specialize in. For portrait photography, consider three-point lighting techniques to create depth and highlight the subject. In product photography, focus on creating even lighting to showcase the product’s features. Food photography often requires diffused lighting to capture the textures and details of the food. Explore DIY lighting modifiers and diffusers to enhance your lighting setup without spending a fortune.

Studio Safety and Maintenance

Safety should never be compromised, even when building on a budget. Implement fire safety precautions, such as keeping flammable materials away from heat sources. Adhere to electrical safety guidelines when setting up your lighting equipment. Regularly clean and maintain your gear to ensure optimal performance and longevity.

Post-Processing and Editing

Post-processing is an essential step in modern photography. Invest in reliable editing software that suits your needs and budget. Consider color management and calibration tools to ensure accurate and consistent colors across your images. Develop an efficient post-processing workflow to streamline your editing process.

Promoting and Marketing Your Studio

Building a portfolio and creating an online presence are crucial for attracting clients to your studio. Develop a portfolio showcasing your best work and create a website to showcase your services. Utilize social media platforms to share your work and engage with potential clients. Collaborate with local businesses or photographers to expand your network and reach a wider audience.

Conclusion

Building your own photography studio on a budget is an achievable goal with the right planning and creativity. By assessing your space, investing in essential equipment wisely, and implementing DIY tips and tricks, you can create a functional and impressive studio without breaking the bank. Remember, it’s your skills and passion as a photographer that truly make your studio shine. So, take the leap, unleash your creativity, and build your dream photography studio on a budget.

Photography has become increasingly popular in recent years, with more and more people seeking to capture stunning images. Whether it’s for personal enjoyment, social media, or professional purposes, everyone wants their photographs to stand out and look professional. While having high-end equipment certainly helps, there are plenty of creative do-it-yourself (DIY) hacks that can take your photography to the next level without breaking the bank. In this article, we will explore some innovative DIY photography hacks that will help you achieve professional-looking shots.

TOP 5 DIY Photography Hacks to Achieve Professional-Looking Shots

1. Lighting Hacks

Lighting plays a crucial role in photography, influencing the mood, clarity, and overall impact of an image. To create a DIY softbox, all you need is a cardboard box, white fabric or paper, and a light source. Simply cut out the sides of the box, leaving a border, and cover them with the white fabric or paper. Place the light source inside the box, and you have your very own softbox, diffusing the light and creating a beautifully even illumination.

Natural light can also be utilized to create stunning effects. Experiment with shooting during the golden hours—sunrise and sunset—for warm and dramatic lighting. You can also use curtains or sheer fabrics to diffuse sunlight and create soft, flattering light indoors.

2. Composition and Framing Hacks

Composition is the art of arranging elements within a photograph. One popular technique is the rule of thirds. Divide your frame into a 3×3 grid and position your subject or points of interest along the lines or at the intersections for a visually pleasing composition.

To achieve bokeh effects, create a DIY filter by cutting out a shape—such as a heart or a star—from a piece of black cardboard or paper and placing it in front of your lens. When you shoot with a wide aperture, the out-of-focus areas will take the shape of the filter, adding a creative touch to your images.

Experiment with leading lines and symmetry to enhance the composition of your shots. Look for natural or man-made lines that draw the viewer’s eye into the frame. Similarly, symmetrical compositions can create a sense of balance and harmony.

3. Lens and Filter Hacks

Professional lenses and filters can be expensive, but you can achieve similar effects with some DIY hacks. For macro photography, attach a magnifying glass to the front of your lens using a rubber band or tape. This makeshift macro lens allows you to capture detailed close-up shots without investing in an expensive macro lens.

Create your own filters by experimenting with different materials. Tissue paper, colored cellophane, or even plastic wrap can be used to add interesting effects to your images. Place the material over your lens or attach it using a rubber band, and you’ll be amazed at the creative possibilities.

4. Post-Processing Hacks

Post-processing is an essential part of achieving professional-looking shots. Even if you don’t have access to expensive editing software, there are plenty of free alternatives that offer powerful editing tools. Experiment with contrast, saturation, and exposure adjustments to enhance the colors and tones in your images.

Create your own Lightroom presets and filters to achieve a consistent editing style across your photographs. This allows you to quickly apply a specific look or feel to your images, giving them a professional and cohesive appearance.

Textures and overlays can add depth and mood to your photographs. Look for free resources online or create your own textures by photographing interesting surfaces, such as rusted metal or cracked paint. Overlay these textures onto your images using photo editing software to add visual interest.

5. Gear Hacks

While professional camera equipment can be costly, there are DIY hacks that can improve your photography without breaking the bank. Most smartphones have impressive camera capabilities. Learn how to maximize the potential of your smartphone camera by experimenting with different modes, settings, and apps specifically designed for photography.

Stabilization is crucial for achieving sharp images, especially in low-light conditions or when capturing long exposures. Instead of investing in an expensive tripod, you can create your own camera stabilizer using household items. Attach your smartphone or camera to a weighted bag or a small bean bag to keep it steady on any surface.

If you need a tripod or monopod for more flexibility, you can make one using everyday items. For a DIY tripod, attach your camera or smartphone to a sturdy base, such as a stack of books, and stabilize it with rubber bands or tape. A monopod can be created by attaching your device to a broomstick or a long stick, providing additional support for steady shots.

Don’t underestimate the creative potential of everyday objects. Utilize items such as mirrors, prisms, or glass objects to introduce reflections and refractions into your images. Experiment with different angles and positions to create unique and captivating effects.

Lastly, protect and carry your camera equipment with innovative DIY solutions. Use padded camera wraps made from old towels or blankets to safeguard your gear from scratches and impacts. Convert a backpack or a messenger bag into a camera bag by adding customizable dividers to keep your equipment organized and protected.

In conclusion, achieving professional-looking shots doesn’t always require expensive equipment. With these DIY photography hacks, you can unleash your creativity and capture stunning images without breaking the bank. From lighting and composition to lenses and post-processing, there are countless ways to enhance your photography skills using simple, homemade solutions. Remember to experiment, think outside the box, and most importantly, have fun as you embark on your journey to capture professional-looking shots. With practice and persistence, your DIY photography hacks will take your images to new heights.